

Introduction
Recently I learned a new feature with Windows 7 and I really liked it and wanted to share it with you !
Well … in this article, I will be showing you how you can simply change the Desktop Icons to whatever size you desire…. large or small icons, you choose.
Usually, with Windows 7, when you want to change the size of the Desktop icons, you would right click on any empty area on the desktop, and then click on View, and then select the size of the icons, either Large, Medium or Small icons.
![]()
For example, below is a quick comparison between the three different default sizes :
![]()
But how about if you want to customize the icons size, for example, to set them larger than the default large size ?? well here is a hint on how to set the icons size to any size you want:
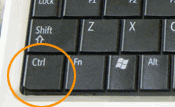
- Using the left click of the mouse, click on an empty area in the desktop. This step is to make sure that there is no application selected/clicked on.
- Using your keyboard, press and keep holding the CTRL button, then using your mouse wheel, roll it upward to make the icons size larger, or downward to set the icon size smaller


As you will notice, now I can have very large icons, as seen in the below snapshot
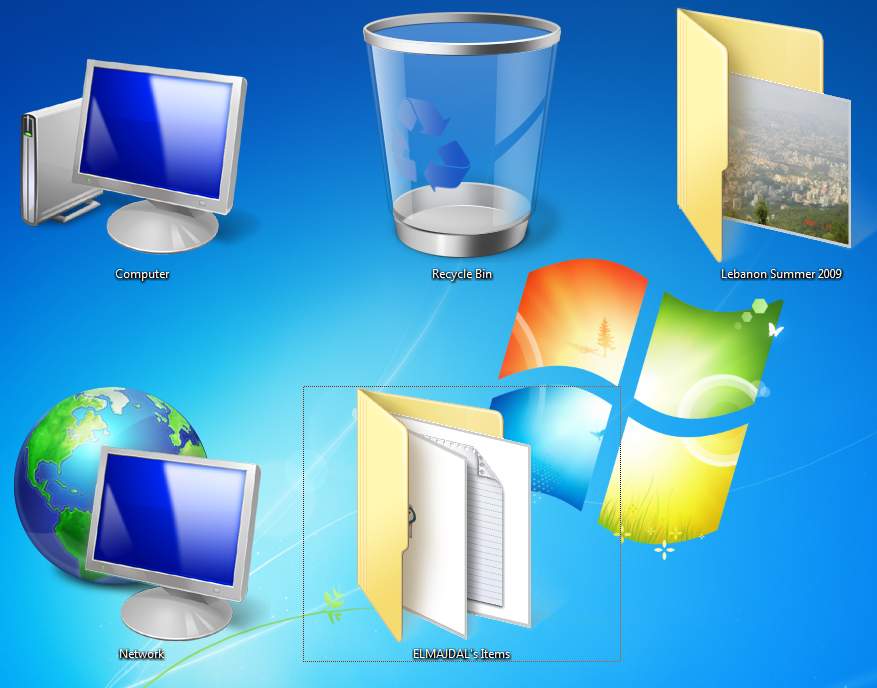
or very small icons
![]()
or any other size in between, depending how I roll the mouse wheel.
Note : At any time, if you desire to restore the original size of the desktop icons, then read the first paragraph of this article again 🙂
Summary
Whether you want very small icons, very large icons or any size in between, you have full control to set the icons size to any size you want. For example, in my case, I have tens of icons on my desktop, and having control to customize the icons size is very helpful.