

Introduction
After you install a clean copy of Windows Server 2008, the Initial Configurations Tasks (ICT) is the first page that you will receive after you logon to Windows Server 2008.
This article was written when Windows Server 2008 was still RC1. Changes might occur later once the product is RTM’d
Once you get through the setup process and finish installing a clean installation of Windows Server 2008 ( in a clean installation I mean the Custom Installation and not the upgrade installations, as you will not receive the Initial Configuration Tasks page with an upgrade installation), you will have a page that says The User’s password must be changed before logging on the first time .
If you clicked on OK, you will be asked to provide a new password and confirm it, make sure to create a complex password.
Logon with the administrator account. Initial Configuration Tasks will open , ICT has three sections:
1. Provide Computer Information
2. Update This Server
3. Customize This Server
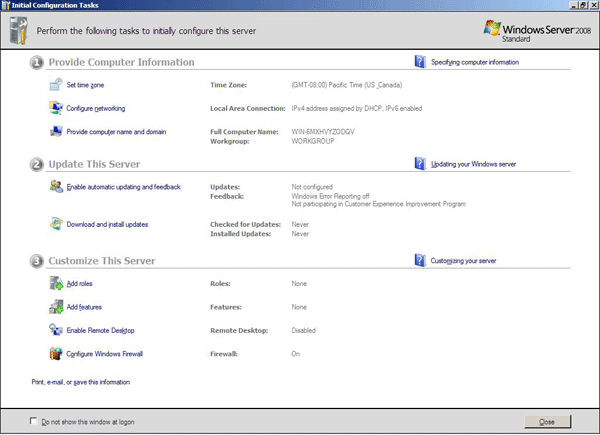
1. Provide Computer Information : It has the following configurations to be set
Set time zone
Configure networking
Provide computer name and domain
Set Time Zone: By default it is set to pacific central time, change it to your time zone.
Click on Set time zone , if the date and time are not set properly, then click on Change date and time button to set them, to change the time zone which as I said earlier it is GMT-08:00 by default, click on Change time zone button and choose your correct time zone from the drop down list > Click OK > OK
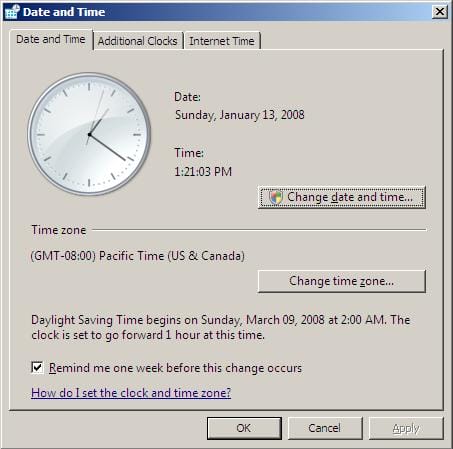

The new time will be reflect inside ICT page
![]()
Configure networking: is step number two in section one, assign your server with a static IP address, or leave it blank if you use DHCP.
To assign your server a static IP, click on Configure networking, the Network Connections page will open, right click on the network card you want to configure > click on properties > click on Internet Protocol Version 4 ( TCP/IPv4) > Click on Properties > choose Use the following IP address and fill the IP/SM/DG/DNS as required > then click OK > OK
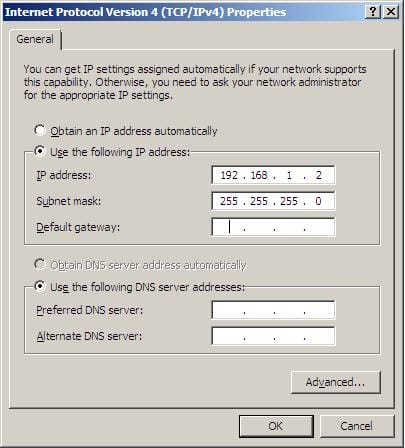
Once you set it, you will notice that changes are reflected inside ICT
![]()
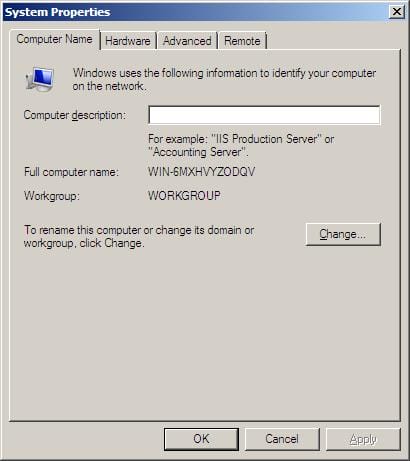
Provide computer name and domain: The last step in section one is giving a meaningful name to your server machine, join it to the appropriate workgroup or domain.
Click on Provide computer name and domain, as you can see the machine has a long name, lets change it to something meaningful. Under the Computer Name tab, click on the Change button, and give your computer a meaningful name.
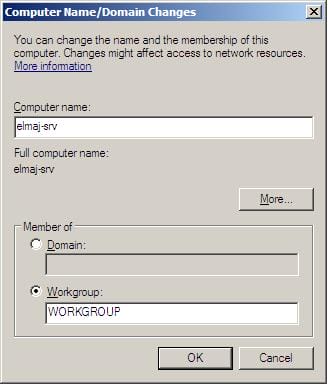
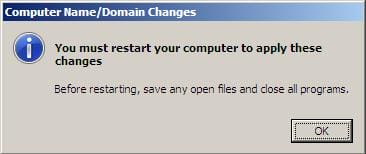
By default it is joined to a workgroup called Workgroup, if you want to change the workgroup name, write a new name, then click OK. if you want to join it to a domain, enable the radio button beside Domain, and then write the domain name, then click OK. For the time being I will not join it to a domain, as I want to set this server my Domain Controller future article. Once you click the OKbutton you will receive a message that the computer must be restarted, close the system properties page, then click on Restart Now to apply the changes.
Once you logon to your machine, ICT will open and you can see the new machine name listed inside ICT.
![]()
- Update This Server : It has the following configurations to be set
- Enable automatic updating and feedback
- Download and install updates
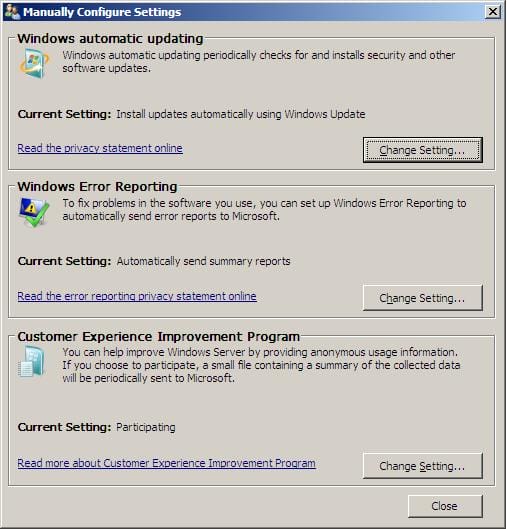
Enable automatic updating and feedback : It is all about sending and receiving feedback data, and downloading/installing windows update.Once you click on it, you will receive a box to configure enabling manual or automatic configurations for sending error reports back to Microsoft, downloading and installating the latest updates , and allowing Microsoft to collect anonymous usage information.
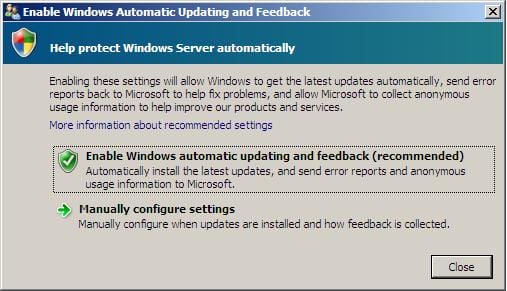
If you clicked on Enable Windows automatic updating and feedback (recommended), the Windows automatic updating, Windows error reporting, customer experience improvement program, will be turned on by default.
if you don’t want to enable all these, then click on Manually configure settings in the first box you received, then click on the Change Setting button and then turn off the settings that you do not wish them to be enabled.
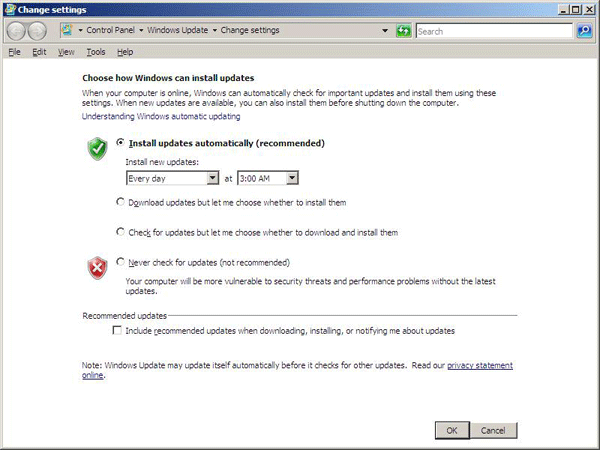
Under Windows automatic updating, if you clicked on the Change Settings button, you can change the setting shown in the below image
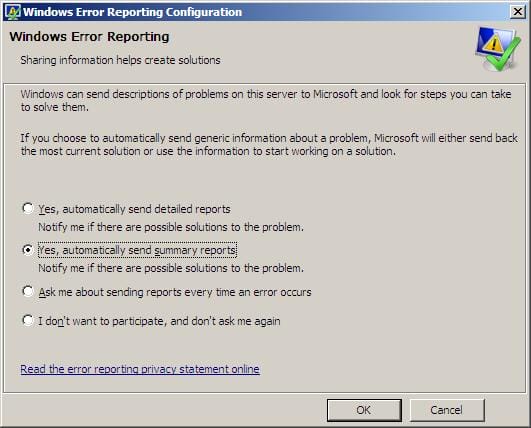
Under Windows Error Reporting, if you clicked on the Change Settings button, you can change the setting shown in the below image
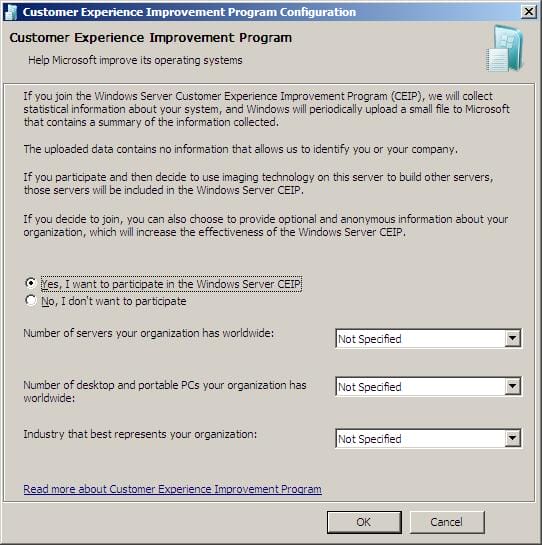
Under Customer Experience Improvement Program, if you clicked on the Change Settings button, you can change the setting shown in the below image
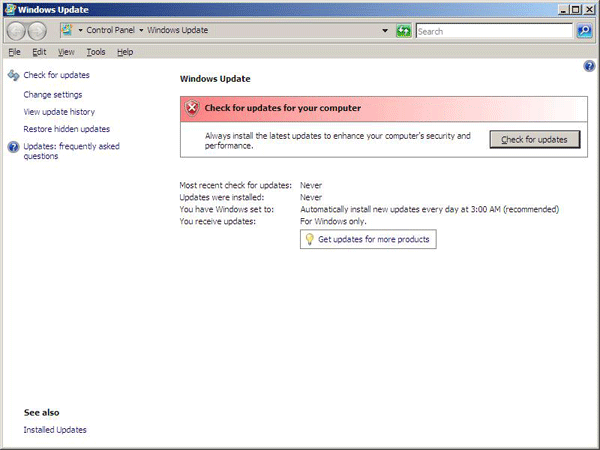
Download and install updates : you can check for updates, or you can change the windows updates settings by clicking from the left side on Change settings, you will receive the same settings page we had seen earlier in the Enable automatic updating and feedback options
3. Customize This Server : It has the following configuration options
- Add roles
- Add features
- Enable Remote Desktop
- Configure Windows Firewall
All these tasks and more can be configured with a single console called Server Manager that I am going to talk about it in future articles by installing few features/roles.
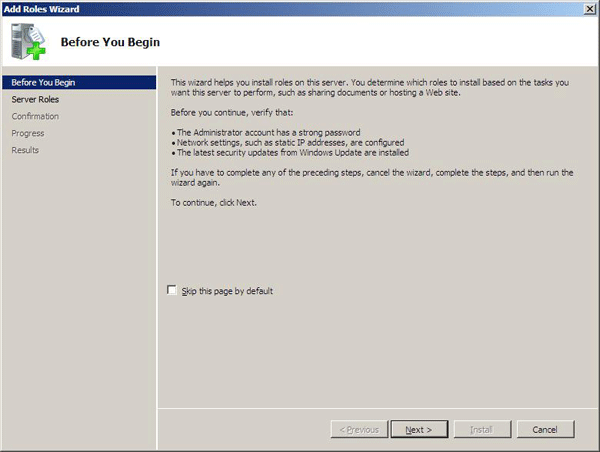
- Add roles: By default, the server does not have any role, to configure this server with a role, click on Add Roles, you will receive the Before you begin page, take a moment to read it and then click on Next.
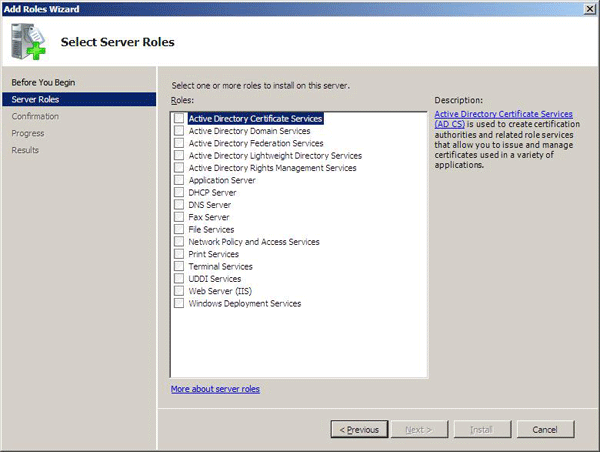
You can then choose which role you want to install, for example Active Directory Domain Services, DNS Server, DHCP Server and so on. For the purpose of this article, I am not going to configure any role or feature. As I have said earlier, I will configure few features and roles later on with future articles.
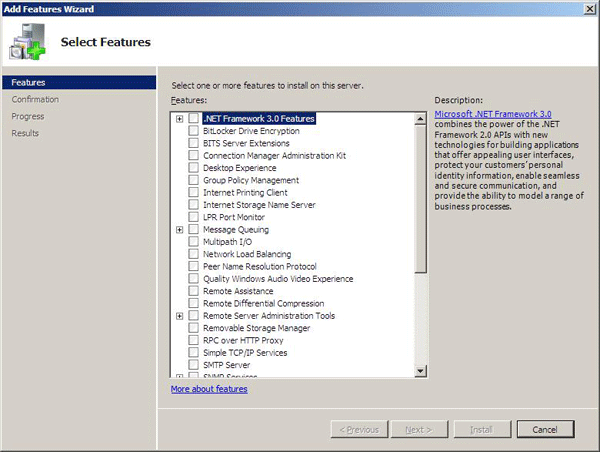
Add Features: Also once you have a clean install of Windows Server 2008, the server will not have any feature installed on it, you can install features by clicking on Add features, you will have a list of all the available features, select any by enabling the checkbox beside the feature(s) you desire to install and then click on the Next button to continue with the wizard.
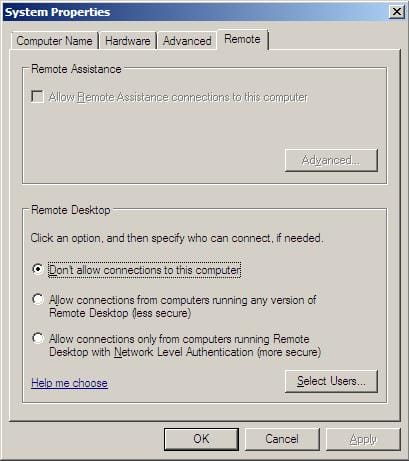
Remote Desktop : It is disabled by default, and you will need to enable it if you wish to remotely control this server.
Configure Windows Firewall : The Windows Firewall by default is turned on, if you desire to change any setting, click on Change Settings

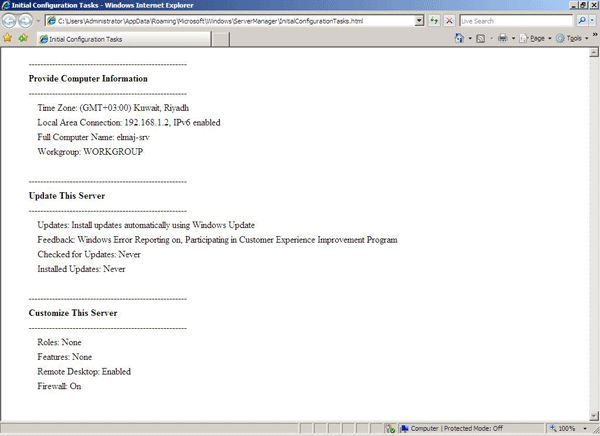
- To have a summary of all the configurations you have set on your server, click on Print, e-mail, or save this information.
 An html page will open and will display for you all the configurations you have set, you can print , e-mail or save this information.
This page resides inside the following folder:
C:\Users\Administrator\AppData\Roaming\Microsoft\Windows\ServerManager\InitialConfigurationTasks.html
Where C is the drive you have Windows Server installed on, and Administrator is the name of the user you are logging with.
Last note, that is if you have enabled the option Do not show this windows at logon
![]()
you will not receive the Initial Configuration Tasks at the next logon, if you wish to launch the ICT again, all you have to do is to go to Start > Run > oobe
Summary
The Initial Configuration Tasks (ICT) is the first page you will receive after you logon to a clean install of Windows Server 2008. With ICT you complete few tasks that are required once a server is installed, such as identifying the computer to other computing resources on your network, securing the computer, adding roles and features. The next thing you would do as an administrator is to start with Server Manager, which I will be working with for adding roles and features to this server in future articles.