


Introduction
This article shows to your how to configure your internal DNS server to forward requests to external servers, a common scenario to your ISP’s DNS servers. Configurations are done on the Internal DNS server and also on ISA Server.
Configuration on DNS Server
1. Click Start, point to Administrative Tools, and then click DNS.
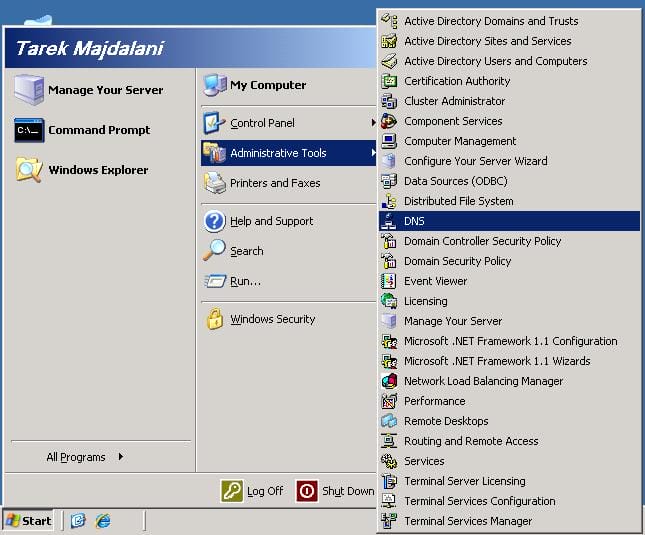
2. Right-click DNS-SRV ( ServerName ), where ServerName is the name of the server, and then click the Forwarders tab.
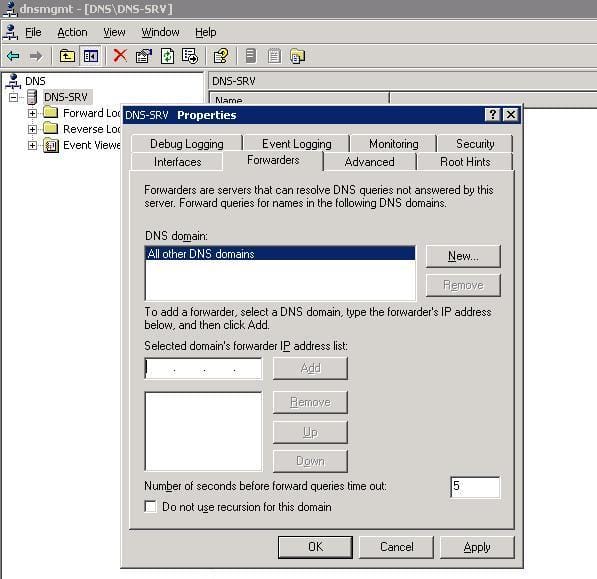
3. Click a DNS domain in the DNS domain list. Or, click New, type the name of the DNS domain for which you want to forward queries in the DNS domain box, and then click OK.
4. In the Selected domain’s forwarder IP address box, type the IP address of the first DNS server to which you want to forward, and then click Add.
5. Repeat step 4 to add the DNS servers to which you want to forward, usually you might have two ISP’s DNS server, enter them both.
6. Click OK
7. The last thing you should do on your DNS Server is to set it as a Secure Nat Client, this is done by setting its Default Gateway to be ISA Server Internal IPThis is all what you have to do on your Internal DNS Server, now lets see what we need to do with ISA Server.
Configuration on ISA Server
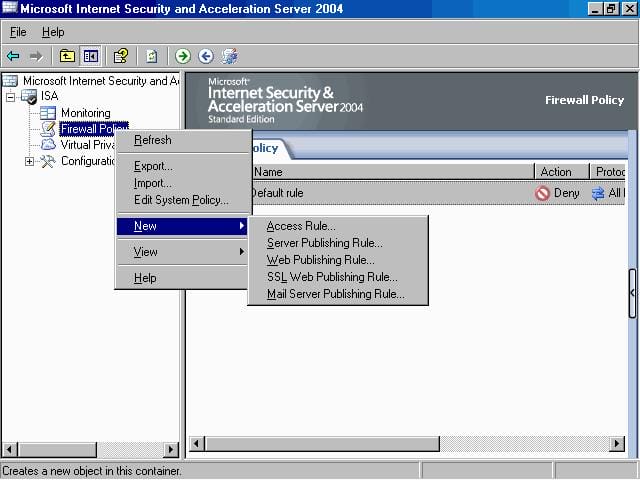
1. Open ISA Management Console
2. Create a new Access rule, Right click Firewall Policy , then click on New then choose Access Rule

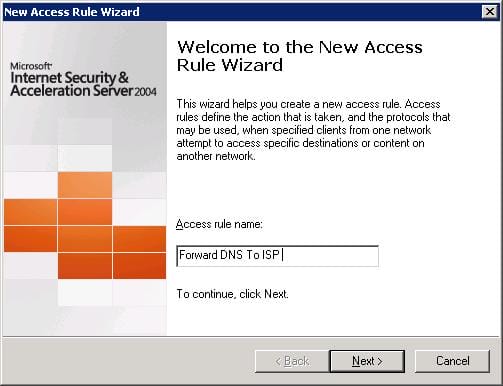
3. The New Access Rule Wizard will be launched, give a name to your new rule , in this example we will name it Forward DNS To ISP, then click Next
4. In the Rule Action page, choose Allow, then click Next
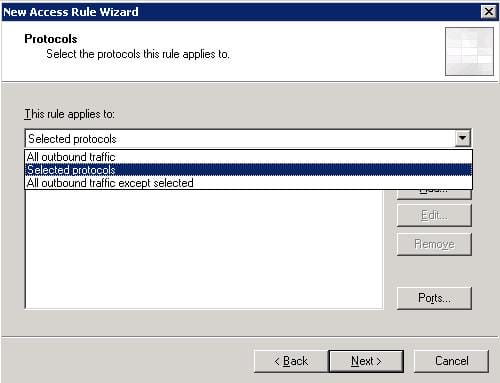
5. In the Protocols page, From the drop down list of This Rule Applies To, choose Selected Protocols
click on Add button, the Add Protocol page will open, expand the Infrastructure container, choose the DNS protocol and click on Add , then click Close
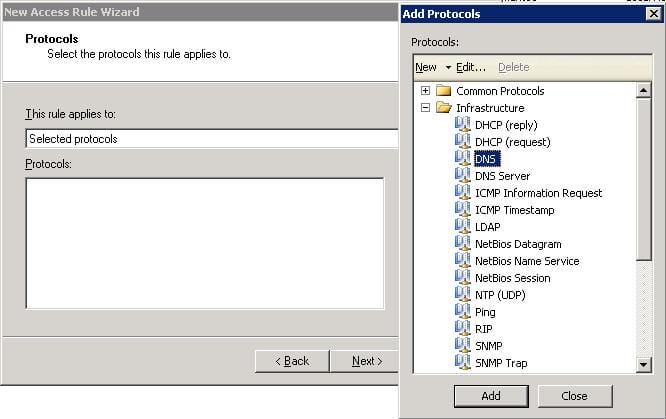
The selected protocol will be displayed in the Protocols page, click Next
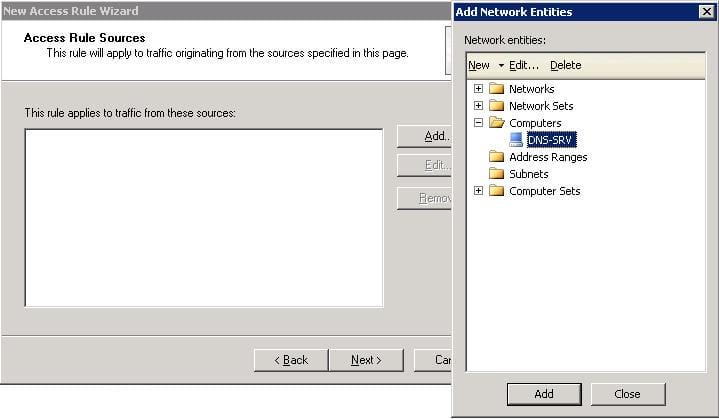
6. On the Access Rule Sources page, click the Add button. In the Add Network Entities dialog box, from the Menu Bar, click on New and choose Computer.
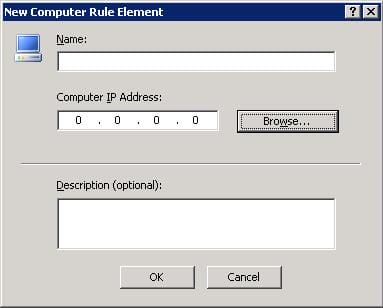
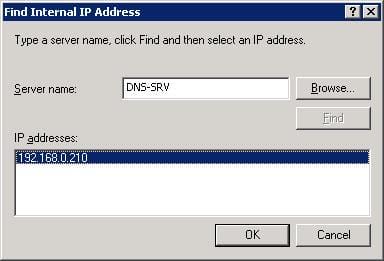
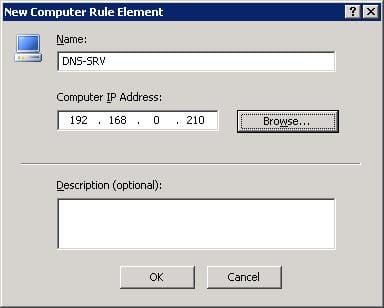
The New Computer Rule Element page will open, click on the Browse button, then write your Internal DNS server name in the
first textbox under Name, and click on Find, the IP address of the DNS server will be listed. Click OK
You will return back to the New Computer Rule Element page, click on OK
click on the Computers folder. Double click on the DNS-SRV, then click the Close button in the Add Network Entities dialog box. Click Next in the Access Rule Sources dialog box.
Click the Add button on the Access Rule Destinations page. In the Add Network Entities dialog box, click the Networks folder. Double click the External entry and click Close in the Add Network Entities dialog box. Click Next on the Access Rule Destinations page.

On the User Sets page, accept the default setting of All Users.

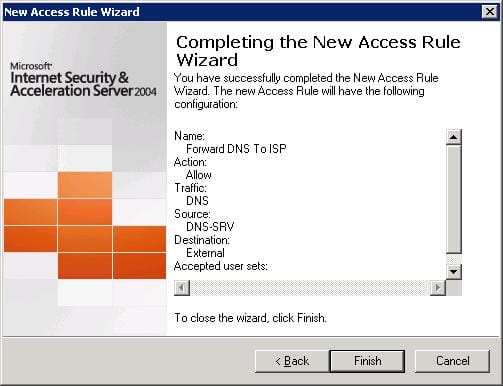
Review your settings and click Finish on the Completing the New Access Rule Wizard page.
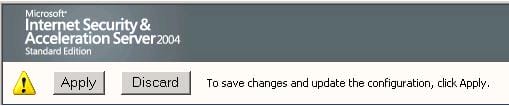
Click the Apply button to save the changes and update the firewall policy.
Your rule will look this :

The rule you have just created will permit your Internal DNS Server to communicate with your ISP’s DNS servers, now we need to create a rule to allow users to surf the internet, start creating a new Access Rule
Right click Firewall Policy , then click on New then choose Access Rule
Name this rule Allow Internet, then click Next
In the Rule Action page, choose Allow, then click Next
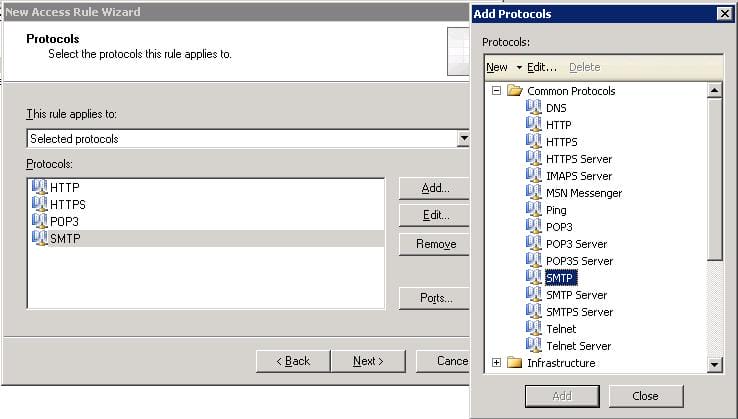
In the Protocols page, From the drop down list of This Rule Applies To, choose Selected Protocols, click on the Add button and from the Common Protocols folder, choose HTTP, HTTPS, POP3 and SMTP. Click Add on each protocol your choose and once you select them all click on Close. The protocols will e displayed in the Protocols page, click Next
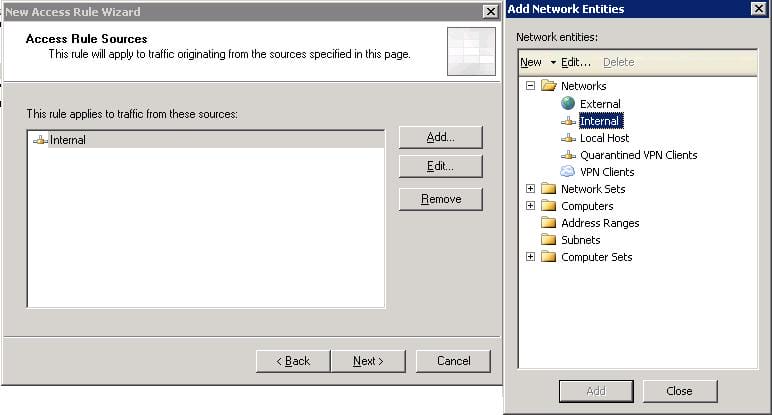
On the Access Rule Sources page, click the Add button. In the Add Network Entities dialog box, click on the Networks folder. Double click on the Internal network, then click the Close button in the Add Network Entities dialog box. Click Next in the Access Rule Sources dialog box.
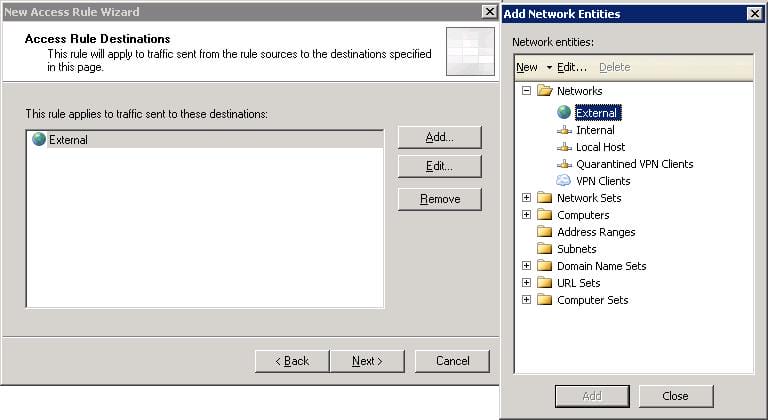
Click the Add button on the Access Rule Destinations page. In the Add Network Entities dialog box, click the Networks folder. Double click the External entry and click Close in the Add Network Entities dialog box. Click Next on the Access Rule Destinations page.
On the User Sets page, accept the default setting of All Users.

Review your settings and click Finish on the Completing the New Access Rule Wizard page.

Now, your rules will look like this:

Click the Apply button to save the changes and update the firewall policy.

Summary
In this article, we learned how to configure our Internal DNS Server to forward request to the ISP’s DNS servers, also we learned to create the necessary rule to allow ISA to allow the DNS communication between the Internal DNS and the ISP DNS.