


Introduction
Exchange Server 2010 SP2 is a recommended update for Exchange Server 2010. It comes not only with bug fixes, but with new features as well. With it, comes new pre-requisites if you are installing/updating Client Access Server (CAS) role. In this article, I will be showing you the new prerequisites and then start with installing SP2.
In my lab, I have a typical Exchange Server installation. A Typical installation consist of the Client Access , Hub Transport and Mailbox Server roles, along with the Exchange Management Console.
Service Pack 2 has a new prerequisites for the Client Access Role. You will need to install the following components on the server that is running CAS role :
-
ISAPI Filters – Web-ISAPI-Filter
-
IIS 6 WMI Compatibility – Web-WMI
-
ASP.Net – Web-Asp-Net
We will start first with running PowerShell commands to install the prerequisites and then download and install SP2.
Note: Make sure the user you are going to login with to install SP2 has the appropriate permission, as SP2 will update your Active Directory Schema. I will be using the same account which was used to install Exchange Server, and this user has the required permissions : Domain Admin, Enterprise Admin and Schema Admin.
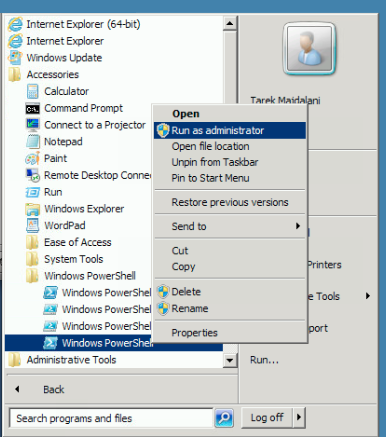
1. launch PowerShell as Administrator
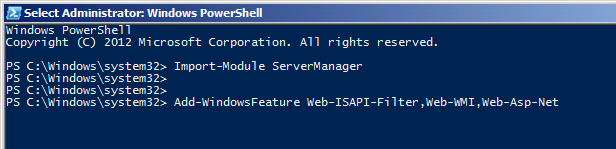
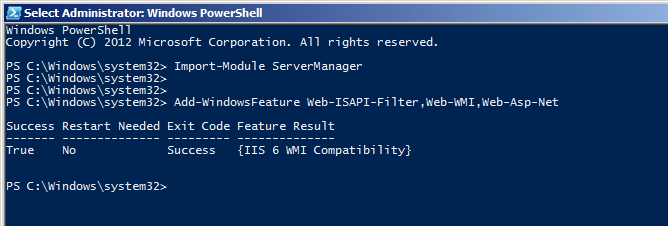
2. Type : Import-Module ServerManager

3. Paste the following in PowerShell to install the required features for SP2:
Add-WindowsFeature Web-ISAPI-Filter,Web-WMI,Web-Asp-Net
The required features will be installed. As you can see, no need to reboot your machine.
1. You can download Service Pack 2 from : http://www.microsoft.com/en-us/download/details.aspx?id=28190
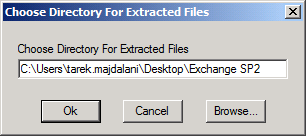
5. Double click on Exchange2010-SP2-x64 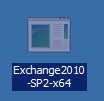 You will be asked where you want to extract the installation files, select a directory and then click on OK.
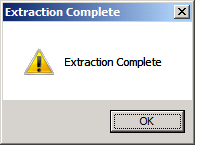
You will be notified when extraction is completed.
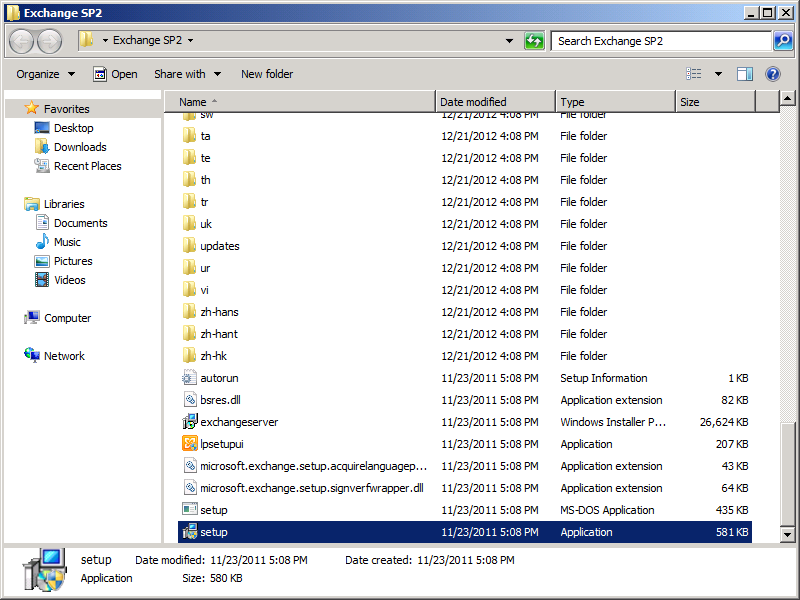
6. Open the Directory where you have extracted SP2, and then double click on setup.exe
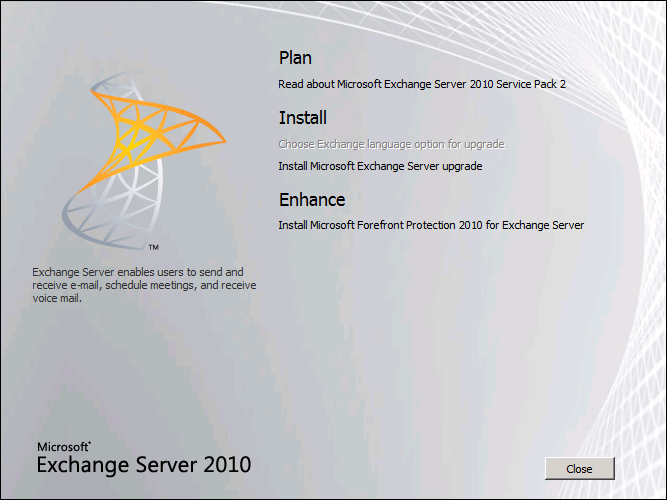
7. Click on Install Microsoft Exchange Server upgrade
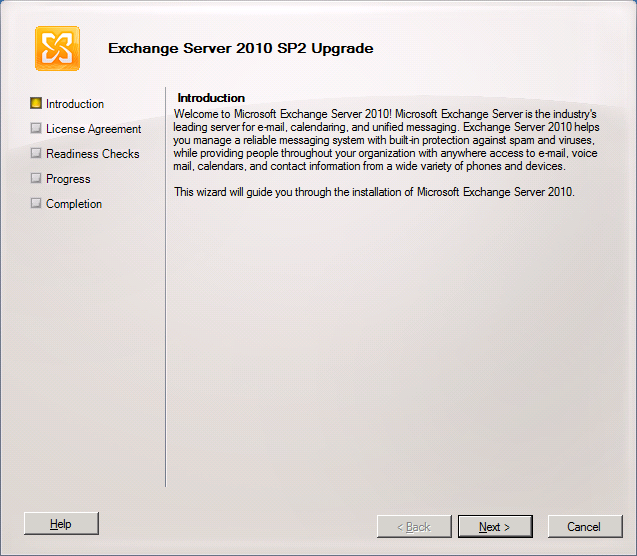
8. On the Introduction page, click Next
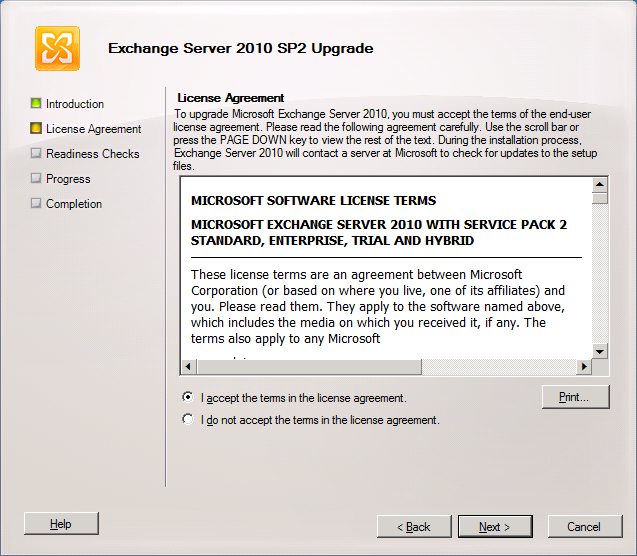
9. Accept the license terms and then click Next
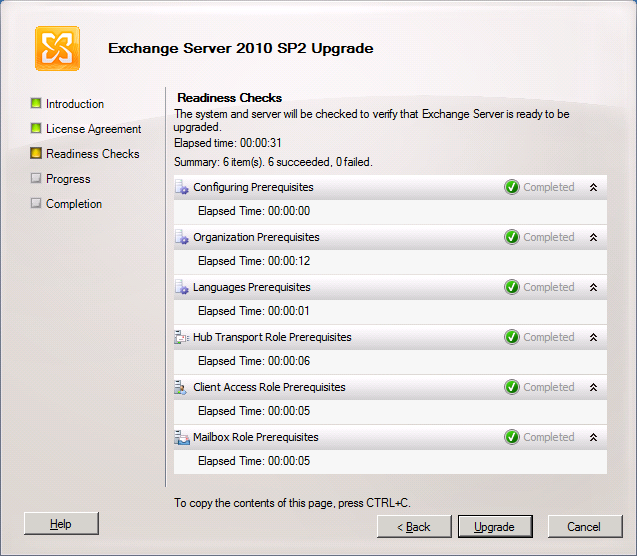
10. The Readiness Check will start, once all shows green, click on Upgrade

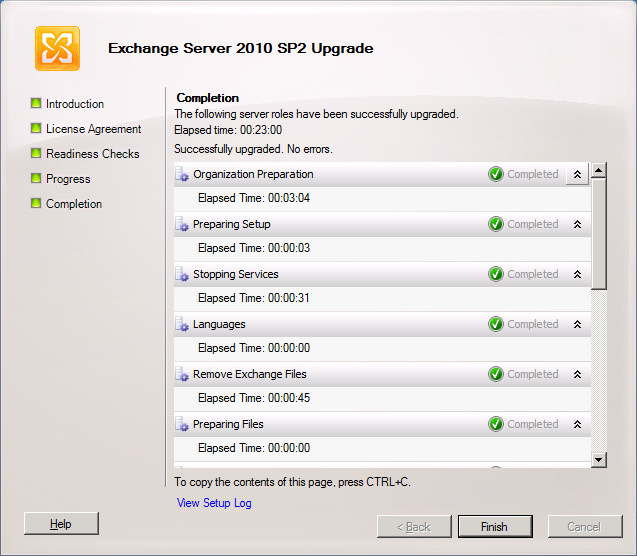
11. Installing Service Pack 2 will start . The progress will take time, so better you get a cup of coffee and wait.

12. the installation in my lab took 23 minutes, and everything went fine with no errors. Click Finish
Although the wizard didn’t ask for a reboot, I prefer after installing any major update to reboot the machine.
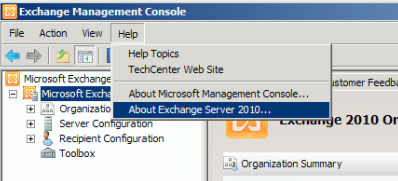
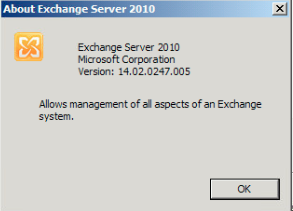
To check Exchange Server version number after installing SP2, open Exchange Management Console, then from the Menu bar, click on Help > About Exchange Server 2010…
Exchange Server 2010 with SP2 version number is : 14.02.0247.005
Related Link
To Download all Cumulative Updates for Exchange Server , check this link : https://www.msexchangeupdates.com/